Table of Contents
Business organizations cannot rely entirely on manual processes, as this leads to approval delays, repetitive tasks, and missed notifications, reducing productivity. To improve these delays, automation tools are required. ServiceNow Flow Designers is a growing solution that enables easier automation and reduces manual labour.
Even if you are not from a technical background, but still want to automate your website and workflows, the no-code/low-code interface of ServiceNow Flow Designer is your go-to solution. It is ideal for users to run and design automated workflows in the system.
In this guide, we will explain what Flow Designer in ServiceNow is, its features and benefits, how it works, how it differs from workflows, and the steps to create custom actions.
What is ServiceNow Flow Designer?
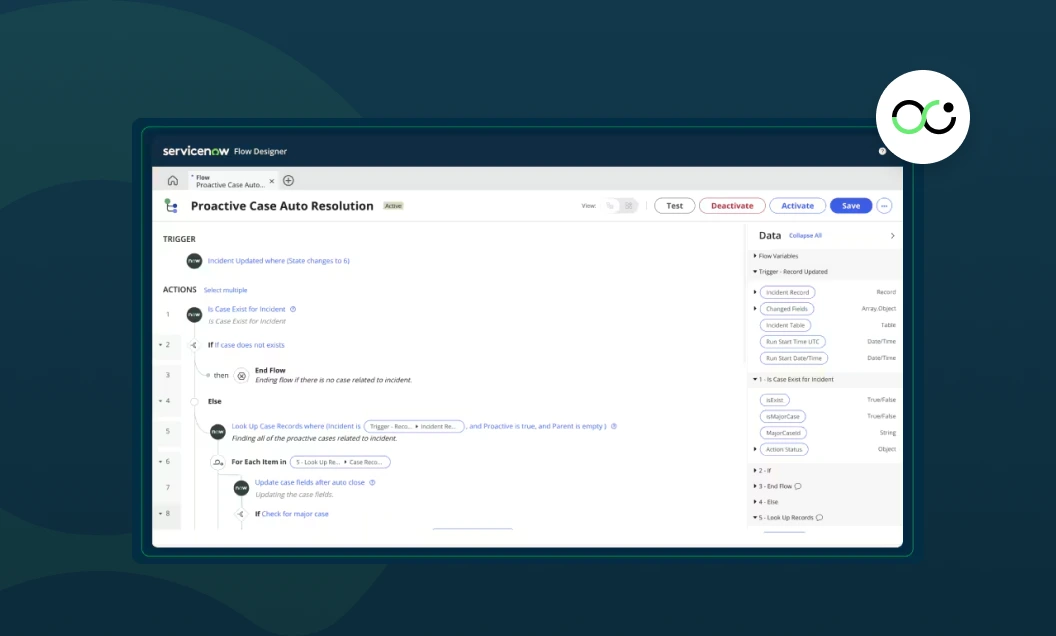
ServiceNow Flow Designer is a low-code automation tool for creating Flows that automate business processes in ServiceNow. It uses a simple drag-and-drop interface to connect actions, triggers, and logic while automating business processes. Think of it as your digital assistant.
When a defined trigger condition is met, Flow Designer automatically performs the necessary actions, such as sending an approval or creating a task. Whether it’s sending auto-approvals or integrating with external applications, Flow Designer in ServiceNow does it all, allowing the team to save time and focus on what matters.
Suppose an employee submits a request to get a new laptop. Here, ServiceNow Flow Designer can:
- Trigger when the request is created.
- Automatically send an approval to the manager (or multiple approvers if needed)
- Define what happens if the request is rejected, such as cancelling it immediately.
- Once approved, create a task for IT.
- Finally, send an update to the employee.
Pro tip:
Approvals are among the most common use cases in the Flow Designer ServiceNow, whether it is routing approval requests, adding multiple approvers for specific processes, or defining why an approval is rejected. Flow Designer simplifies and automates each step, eliminating manual follow-ups.
Benefits of Flow Designer in ServiceNow
Implementing Flow Designer can transform how your organization works. Some of the main benefits of Flow Designer in ServiceNow include:
- Faster Automation: Speeds up workflow creation, so you don’t wait months for development.
- Improved Efficiency: Automates repetitive tasks, reducing errors and saving employee time.
- Broad Accessibility: Empowers business users, not just developers, to build workflows.
- Better Integrations: Connect ServiceNow with external apps to automate end-to-end processes.
- Scalability: Whether it’s a simple task automation or a complex cross-department process, Flow Designer scales with your needs.
Key Features of Flow Designer
Flow Designer comes packed with features that make it a game-changer for automation in ServiceNow:
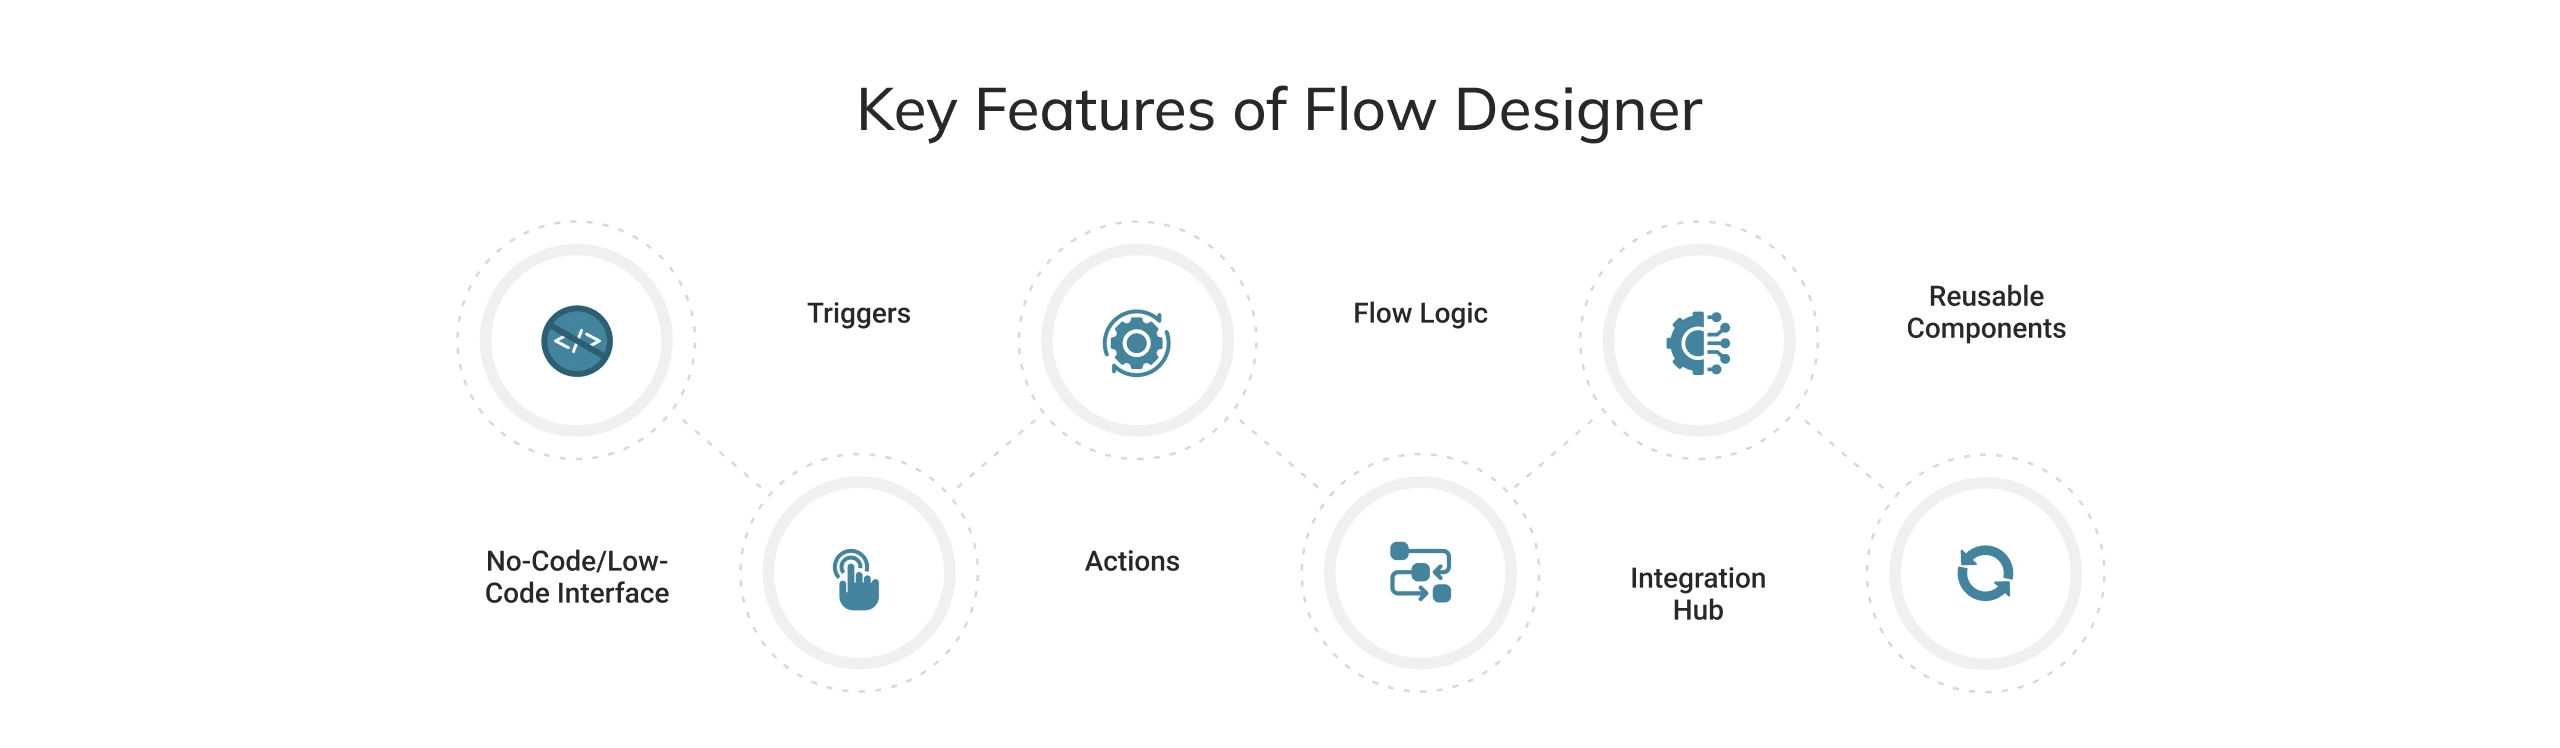
No-Code/Low-Code Interface
The drag-and-drop feature in the flow designer allows developers and business admins to maintain complex business processes. It helps with better development and a transparent automation process, with minimal scripting, while still allowing JavaScript for advanced logic when required.
Triggers
Triggers determine when a flow runs. These can be:
- Record-based: Used when a record is created, updated, or deleted on a target table (incident, request, and change)
- Scheduled: Executed at a specific time or frequency, like every morning, to send reminders for overdue tasks.
- Event or integration-based: Triggered through integrations, API calls, or platform events outside standard record changes.
Actions
Actions are the building blocks of a flow that perform specific tasks, such as creating tasks, updating fields, or sending email notifications. It standardises developers’ operations for combining complex logic and makes it easier for low-code users.
Flow Logic
Add conditional statements to make wise decisions in your workflows, for instance, assigning high-priority incidents to a specific team. It enables quick, straightforward automations based on real-time data and prior action outcomes.
Integration Hub
Extend flows beyond ServiceNow by connecting to third-party applications (such as Slack, Microsoft Teams, or Jira) using ready-made connectors, known as spokes, available through the Integration Hub (a licensed feature). These connectors handle complex API calls for seamless, low-code integration.
Reusable Components
Create custom actions and subflows that can be reused across multiple parent flows, with optional scripting for advanced use cases. These are perfect for increasing consistency and efficiency, and reducing duplication.
Flow Designer vs Workflow in ServiceNow
ServiceNow Flow Designer and Workflow are both low-code/no-code editor tools; however, the significant difference is that Workflow is a legacy workflow engine, whereas Flow Designer is the modern workflow engine and low-code designer.
| Feature | Flow Designer | Workflow |
|---|---|---|
| User Focus | Requires a low-code/no-code approach that is easy to implement. | Requires administrators and developers with technical skills. |
| Interface | Drag-and-Drop and linear with actions and flow logic. | Uses Flowchart and Visio Style editor with transitions and activities. |
| Reusability | Focuses on the use of Actions and subflows across multiple parent flows. | The logic is embedded in the specific workflow, limiting multipurpose use. |
| Rollback | Requires custom designing and conditional logics for rollback activity. | It has an inbuilt ‘Rollback to’ activity, perfect for transactional processes. |
| Data Handling | Uses Data Pills and Flow variables. (modern scratchpad) | Uses Scratchpad Variables (manipulates using scripts) |
Though legacy workflows remain, the future of automation in ServiceNow lies in Flow Designer, which aligns with the platform’s no-code/low-code development strategy.
How to Create a Flow in ServiceNow?
Creating a flow in ServiceNow is simple:
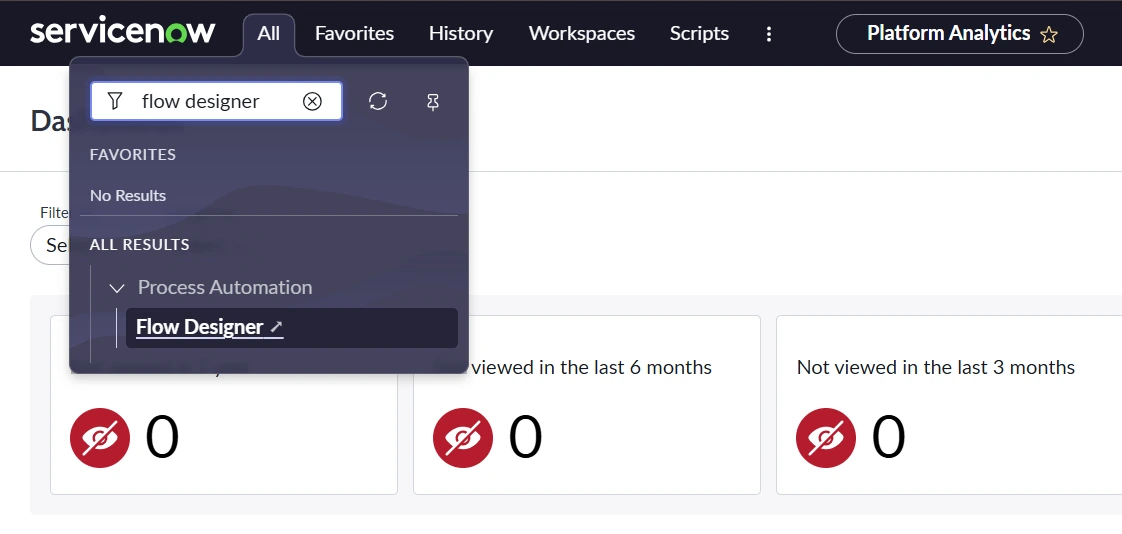
1. Navigate to Flow Designer
In the application navigator, type Flow Designer and select it.
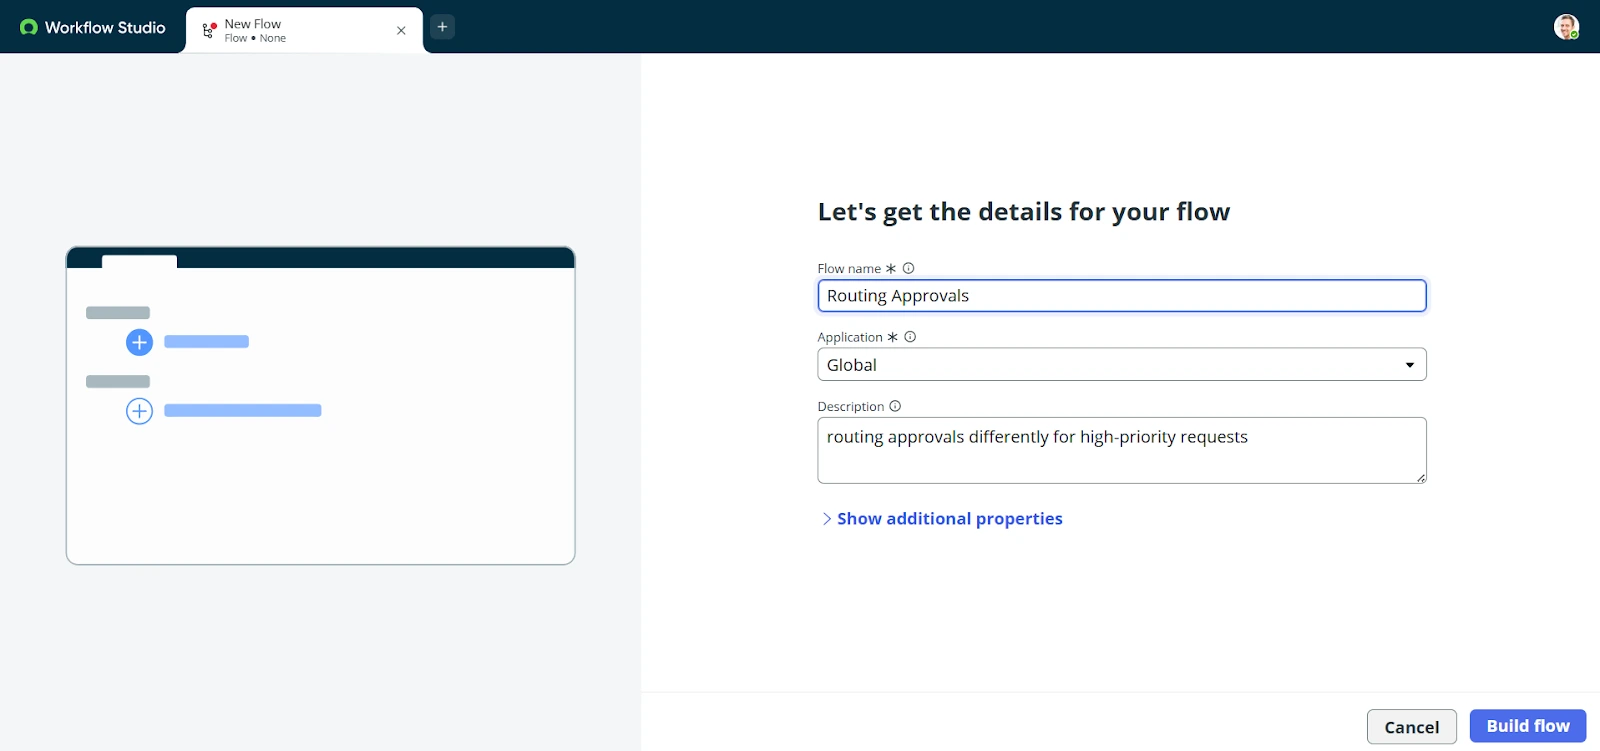
2. Create a New Flow
Click the New Button and Select Flow. Enter a name and description.

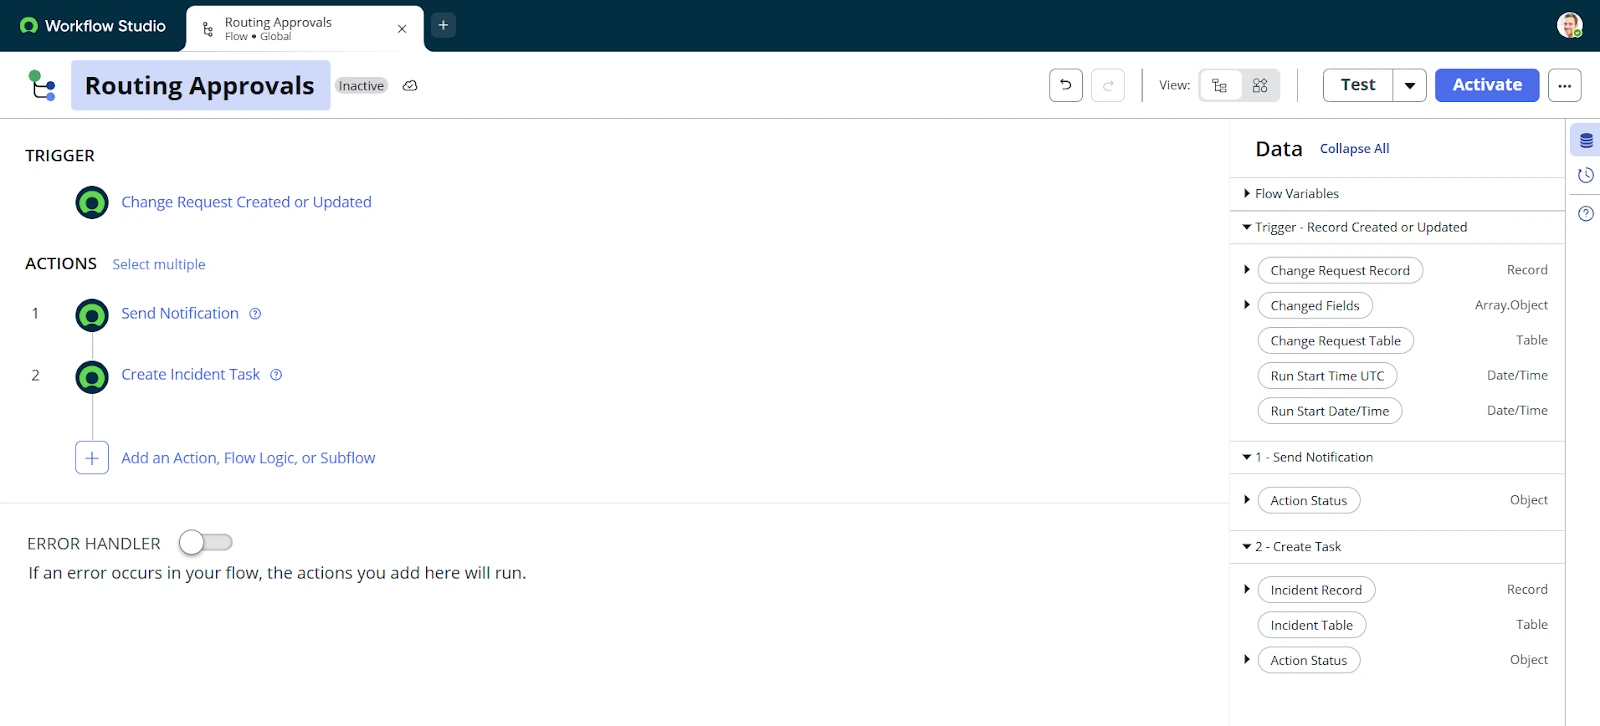
3. Define a Trigger
Choose how the flow should start: record-based, scheduled, or application-based.
4. Add Actions
Drag and drop actions (like sending notifications or creating tasks) into your flow.
5. Add Logic (Optional)
Use conditions to make the flow smarter—for example, routing approvals differently for high-priority requests.
6. Test and Activate
Run the flow with sample data to ensure it works correctly, then activate it.
How to Create a Custom Action in Flow Designer?
Sometimes, the pre-built actions are not enough. In such cases, you can create custom actions in Flow Designer:
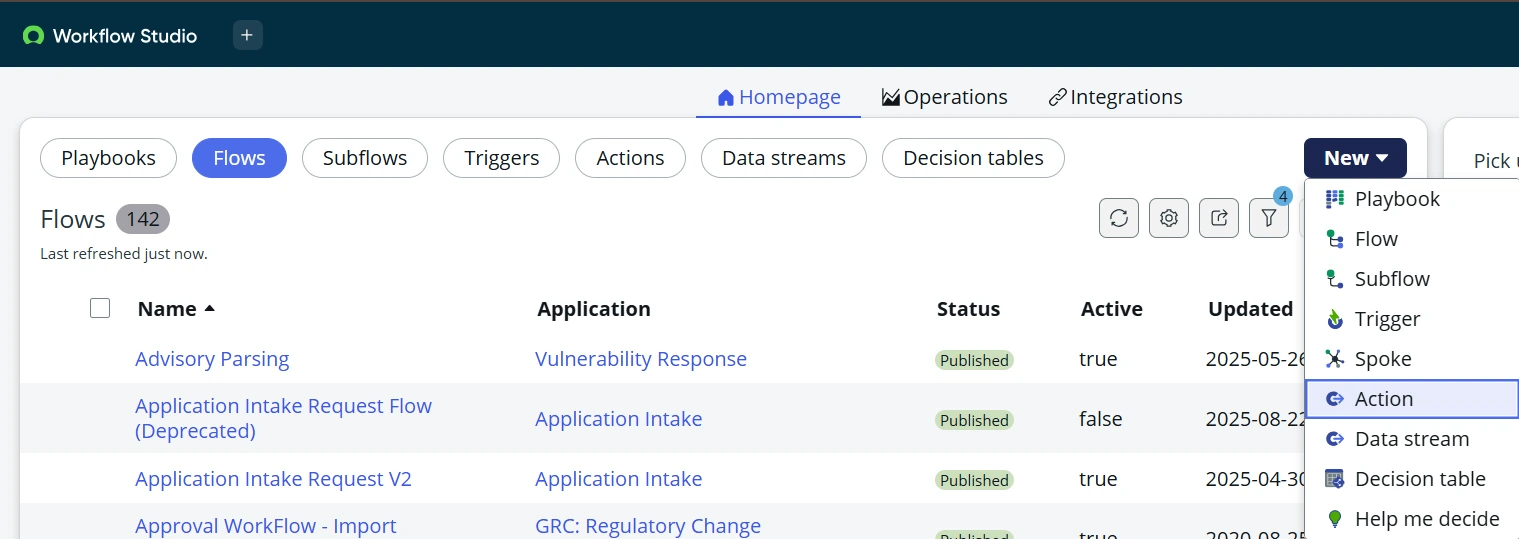
1. Go to Flow Designer > New > Actions.
2. Enter the Custom Action name and description.
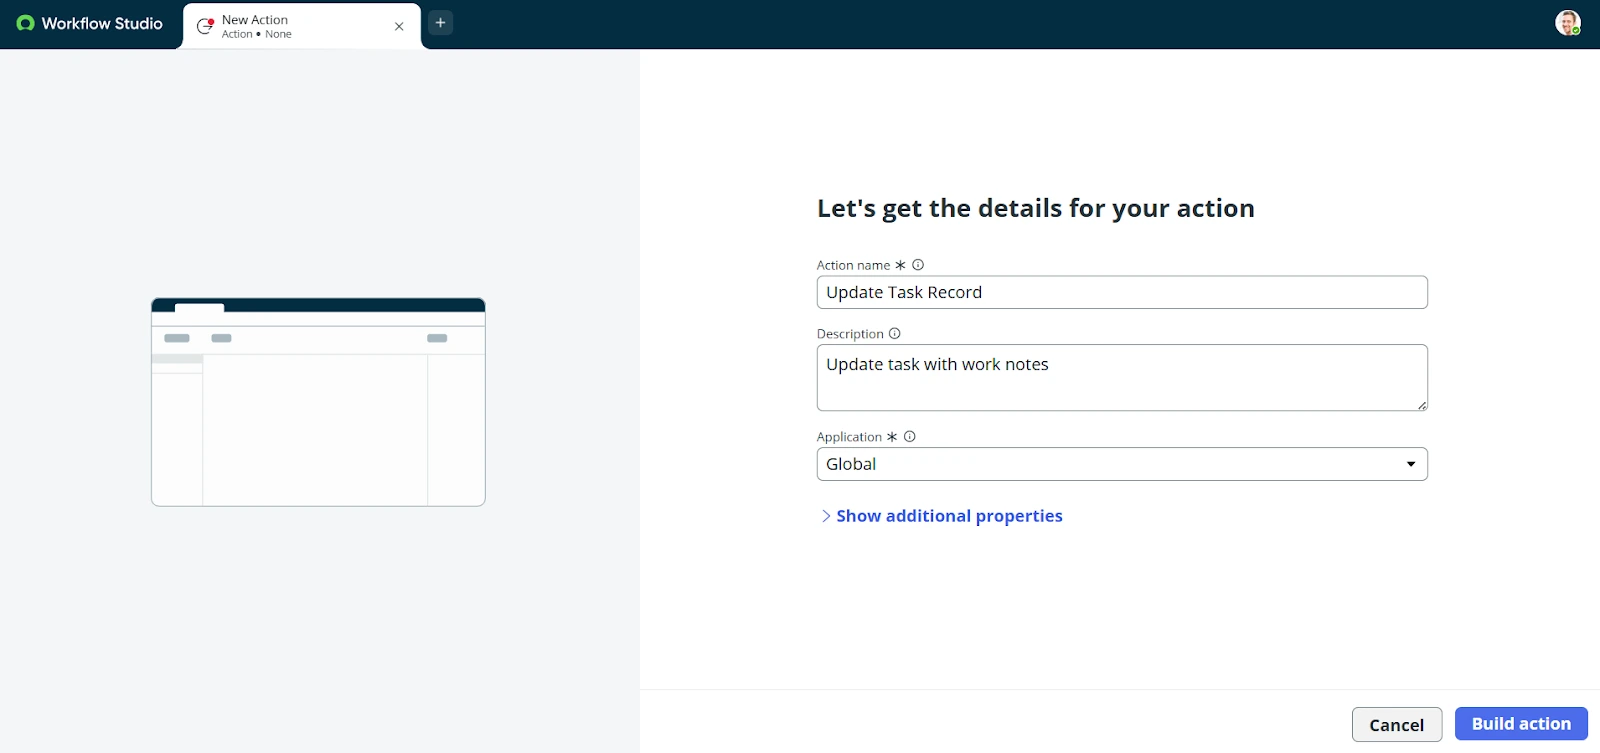
3. Define the inputs and outputs by clicking the create button.

4. Add steps inside the action (like scripts or data lookups).
5. Save and publish the action.
These custom actions can then be reused across multiple flows, making them powerful building blocks for automation.
In Light of These Points
Lastly, it is reasonable to conclude that ServiceNow Flow Designer is more than just a tool; it is the future of workflow automation. By providing a user-friendly interface, the low-code ServiceNow Flow Designer helps automate complex processes.
It is easy to integrate and offers advanced technology compared to traditional workflow systems. It provides efficiency, accuracy, and scale for automation. Now that we understand how to create a flow or custom action in the flow designer, it is time to elevate your ServiceNow learning with the S2 Labs ServiceNow Admin Training program.