
Lead Assignment Rules in Salesforce
Chapter Topics
- What is Sales Cloud in Salesforce?
- Accounts in Salesforce
- Campaign Management in Salesforce
- Contacts in Salesforce
- Salesforce Lead and Lead Processes
- Lead Assignment Rules in Salesforce
- Lead Conversion in Salesforce
- Opportunities in Salesforce
- Products and Pricebooks in Salesforce
- Quotes in Salesforce
Lead assignment rules in Salesforce are automated processes that assign leads to users or queues. Effective lead management in Salesforce is important to boost sales, and these rules ensure leads are managed and distributed correctly within your company.
This technical blog will walk readers through the nuances of Salesforce’s lead assignment rules, look at actual cases, and comprehend the significant advantages they provide.
What are Lead Assignment Rules?
Salesforce Lead Assignment Rules automatically assign lead records to a particular user or queue based on different conditions. It can contain many rule entries that determine the lead’s assignee. Rule entry specifies the following:
- Sort Order, which determines the order of evaluation of rule entries.
- Entry criteria determine which rule entry the response will be sent through.
- Name of the user/queue to which the record should be assigned.
- An email template will be used to send the response.
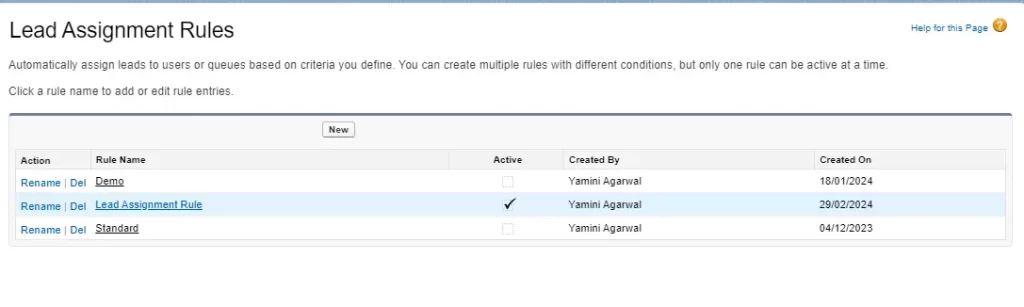
We can create as many assignment rules as we want, but only one can be active at a time. “Don’t Reassign Owner” ensures the prevention of assignment rules from overwriting the existing record owner.

Example Scenario
Source-Based Assignment – Leads originating from the company’s website forms are assigned to the inside sales team. Assign leads automatically Salesforce to the relevant representatives based on the web form source, ensuring quick responses.
Territory-Based Assignment – For leads generated from trade shows, assignment rules are configured to assign them to the field sales representatives responsible for the respective geographic territories. This ensures that local representatives handle leads effectively.
Round-Robin Assignment – Marketing campaigns yield a large volume of leads. To distribute these leads equitably, the organization uses round-robin assignment rules. Leads are systematically rotated among the sales representatives, ensuring a fair distribution of opportunities.
How to Create Salesforce Lead Assignment Rules?
Creating lead and case assignment rules in Salesforce is a relatively straightforward process.
Step 1: After logging in, go to the horizontal navigation bar’s upper right corner and choose Setup.
Step 2: Type “assignment rules” into the Setup search box, then choose Lead Assignment Rules.

Step 3: To add a new assignment rule, select New.

Step 4: Enter a name in the Rule Name box and click Save when finished.

Step 5: To specify your rule criteria, click on your newly generated rule and choose New in the Rule Entries.

Here, the “Enter the rule entry” window requires you to enter an Order for your new rule (the order in which the entry is processed, like a queue).
Next, determine whether your new rule is based on meeting a set of criteria or on a formula. In the “Run this rule if the” dropdown box, select either “criteria are met” or “formula evaluates to true.”

Lastly, select the user or queue to whom your rule will assign your new lead (use the lookup feature to find specific users or a queue)

Step 6: After completing these steps, select Save.

Benefits of Lead Assignment Rules
Implementing lead assignment rules in Salesforce provides several key benefits:
- Leads are automatically routed to the most suitable representatives or teams, reducing manual assignment efforts.
- It is used to assign the owner to a lead record from Web-to-Lead. But when creating lead records manually, the ‘Assign using active assignment rule’ must be checked. If the checkbox is unchecked or the rule is not fired properly, the owner will be the record’s creator.
- With source-based rules, organizations can ensure leads are promptly addressed, resulting in faster response times and higher lead-to-opportunity conversion rates.
- Territory-based rules enable organizations to match leads with representatives who have in-depth knowledge of specific regions, increasing the likelihood of successful conversions.
- Round-robin assignment rules prevent overloading a single representative and ensure that all sales team members have an equitable opportunity to engage with potential customers.
- Automation reduces the likelihood of manual errors in lead assignment, ensuring that no lead is overlooked.
Lead assignment rules in Salesforce are potent tools for optimizing lead management. Whether it’s routing leads by source, assigning them to the proper territory, or equitably distributing them across your sales team, these rules streamline the process and improve efficiency.
By understanding the principles of lead assignment rules and harnessing their capabilities, organizations can ensure that no lead goes unattended, resulting in increased conversion rates and driving sales success.
Next TopicNeed more support?
Get a head start with our FREE study notes!
Learn more and get all the answers you need at zero cost. Improve your skills using our detailed notes prepared by industry experts to help you excel.